Below is my setup for a OpenVPN server in bridged mode with local firewall.
In short we will create a VPN server with the following setup:
[one_half]

[/one_half]
[one_half_last]
[arrow_list]
[list_item]Debian 6 as VPN server.[/list_item]
[list_item]VPN Server on TCP port 443 (SSL)[/list_item]
[list_item]2048bit key size[/list_item]
[list_item]Local subnet of 192.168.255.0/24[/list_item]
[list_item]Max 10 VPN Clients[/list_item]
[list_item]All config files will be kept in /etc/openvpn[/list_item]
[list_item]Local firewall to control access for VPN users[/list_item]
[/arrow_list]
[/one_half_last]
If you are using ESXi follow this post first:Â OpenVPN bridge and vmware esxi.
Installation
First install the required packages:
apt-get install openssl bridge-utils openvpn zip |
apt-get install openssl bridge-utils openvpn zip
Copy over the example easy-rsa 2.0 data to /etc/openvpn
cp -a /usr/share/doc/openvpn/examples/easy-rsa/2.0/ /etc/openvpn/easy-rsa |
cp -a /usr/share/doc/openvpn/examples/easy-rsa/2.0/ /etc/openvpn/easy-rsa
Now we need to edit the vars file in the easy-rsa folder to match your organization information, so change EXAMPLE to your own info.
cd /etc/openvpn/easy-rsa
sed -i '/export EASY_RSA=/ c\export EASY_RSA=\"/etc/openvpn/easy-rsa\"' vars
sed -i '/export KEY_SIZE=/ c\export KEY_SIZE=2048' vars
sed -i '/export KEY_COUNTRY=/ c\export KEY_COUNTRY=\"EXAMPLE\"' vars
sed -i '/export KEY_PROVINCE=/ c\export KEY_PROVINCE=\"EXAMPLE\"' vars
sed -i '/export KEY_CITY=/ c\export KEY_CITY=\"EXAMPLE\"' vars
sed -i '/export KEY_ORG=/ c\export KEY_ORG=\"EXAMPLE\"' vars
sed -i '/export KEY_EMAIL=/ c\export KEY_EMAIL=\"user\@example.com\"' vars |
cd /etc/openvpn/easy-rsa
sed -i '/export EASY_RSA=/ c\export EASY_RSA=\"/etc/openvpn/easy-rsa\"' vars
sed -i '/export KEY_SIZE=/ c\export KEY_SIZE=2048' vars
sed -i '/export KEY_COUNTRY=/ c\export KEY_COUNTRY=\"EXAMPLE\"' vars
sed -i '/export KEY_PROVINCE=/ c\export KEY_PROVINCE=\"EXAMPLE\"' vars
sed -i '/export KEY_CITY=/ c\export KEY_CITY=\"EXAMPLE\"' vars
sed -i '/export KEY_ORG=/ c\export KEY_ORG=\"EXAMPLE\"' vars
sed -i '/export KEY_EMAIL=/ c\export KEY_EMAIL=\"user\@example.com\"' vars
Now build your CA and server key (you already have provided all the right info in the vars file so press enter all the way through).
source ./vars
./clean-all
./build-ca
./build-key-server server
./build-dh |
source ./vars
./clean-all
./build-ca
./build-key-server server
./build-dh
Now we need to create a server.conf file in /etc/openvpn
cd /etc/openvpn && vi server.conf |
cd /etc/openvpn && vi server.conf
server.conf
I will use TCP port 443 for the VPN server with a local subnet of 192.168.255.0/24
IP’s 192.168.255.200~192.168.255.210 will be used for client DHCP (max 10 clients), and 192.168.255.3 is the OpenVPN server himself.
port 443
proto tcp
dev tap0
ca /etc/openvpn/easy-rsa/keys/ca.crt
cert /etc/openvpn/easy-rsa/keys/server.crt
key /etc/openvpn/easy-rsa/keys/server.key
dh /etc/openvpn/easy-rsa/keys/dh2048.pem
ifconfig-pool-persist ipp.txt
server-bridge 192.168.255.3 255.255.255.0 192.168.255.200 192.168.255.210
keepalive 10 120
comp-lzo
persist-key
persist-tun
log /var/log/openvpn.log
log-append /var/log/openvpn.log
status /var/log/openvpn-status.log
verb 3

#===================================================#
# Client Settings
#===================================================#
# If you need to push routes you can do so here for example:
#push "route 192.168.0.0 255.255.255.0 192.168.255.1"

push "ping 10"
push "ping-restart 60"

push "dhcp-option DOMAIN example.local"
push "dhcp-option DNS 192.168.255.1"
push "dhcp-option DNS 192.168.255.2"
push "dhcp-option WINS 192.168.255.1"
push "route-delay 5"

push "echo "
push "echo Welcome to the EXAMPLE Network!"
push "echo "
Now we need to bridge the OpenVPN tap0 interface with your network interface (eth0 in this example).
Make sure to change the settings for your network (IP, subnet, gateway etc) as this will replace your current interface configuration don’t do this remotely.
/etc/init.d/bridge
#!/bin/bash

### BEGIN INIT INFO
# Provides:             bridge
# Required-Start:       $remote_fs $syslog
# Required-Stop:        $remote_fs $syslog
# Default-Start:        2 3 4 5
# Default-Stop:
# Short-Description:    Bridge for OpenVPN
### END INIT INFO

# Define Bridge Interface
br="br0"
# Define list of TAP interfaces to be bridged,
# for example tap="tap0 tap1".
tap="tap0"
# Define physical ethernet interface to be bridged
# with TAP interface(s) above.
eth="eth0"
eth_ip="192.168.255.3"
eth_netmask="255.255.255.0"
eth_broadcast="192.168.255.255"
gw="192.168.255.254"

#################################
# Set up Ethernet bridge on Linux
# Requires: bridge-utils
#################################
start_bridge () {
        for t in $tap; do
                openvpn --mktun --dev $t
        done

        brctl addbr $br
        brctl addif $br $eth

        for t in $tap; do
                brctl addif $br $t
        done

        for t in $tap; do
                ifconfig $t 0.0.0.0 promisc up
        done
        ifconfig $eth 0.0.0.0 promisc up
        ifconfig $br $eth_ip netmask $eth_netmask broadcast $eth_broadcast up
        route add default gw $gw $br
}

####################################
# Tear Down Ethernet bridge on Linux
####################################
stop_bridge () {
        ifconfig $br down
        brctl delbr $br
        for t in $tap; do
                openvpn --rmtun --dev $t
        done
        ifconfig $eth $eth_ip netmask $eth_netmask broadcast $eth_broadcast up
        route add default gw $gw $eth
}

####################################
# OPTIONS
####################################
case "$1" in
        start)
          echo -n "Starting Bridge"
          start_bridge
          ;;
        stop)
          echo -n "Stopping Bridge"
          stop_bridge
          ;;
        restart)
          stop_bridge
          sleep 2
          start_bridge
          ;;
        *)
          echo "Usage: $0 {start|stop|restart}" >&2
          exit 1
          ;;
esac
Now make the script executable and set it as a default startup script:
chmod 755 /etc/init.d/bridge
update-rc.d bridge defaults |
chmod 755 /etc/init.d/bridge
update-rc.d bridge defaults
User creation script
For easy management I create a template config file and a script to create the certificate and zip the certificates and config file so you can send it to a user.
First we will create a template config file for openvpn, make sure to edit the VPNSERVERHOSTNAME to your hostname/ip for the VPN Server.
Create a configs directory, here we will keep the user configuration zip files later on.
cd /etc/openvpn
mkdir configs
cd /etc/openvpn/configs
vi template-config.ovpn |
cd /etc/openvpn
mkdir configs
cd /etc/openvpn/configs
vi template-config.ovpn
client
dev tap
proto tcp
remote VPNSERVERHOSTNAME 443
resolv-retry infinite
nobind
pkcs12 <>.p12
ns-cert-type server
comp-lzo
verb 3
#redirect-gateway
Then create the new-user script.
cd /etc/openvpn
vi new-user |
cd /etc/openvpn
vi new-user
#!/bin/bash
action="$1"
option="$2"
base="/etc/openvpn"
#
#if [ -n $base/configs/$username ]

#----------------------------------------------------------------#
# new user
#----------------------------------------------------------------#
function new_user()
{
 echo "Creating the new user $username"

 # source the easy-rsa variables:
 source $base/easy-rsa/vars

 echo "Checking if user already exists"
 if [ -x $base/configs/$username ]
  then
   echo "ERROR: user already exists"
   echo ""
   exit 0
 else
  echo "Please check the already filled in answers and press"
  echo "enter for all the options finaly press 'Y' twice."
  echo ""
  sleep 5
  $base/easy-rsa/build-key-pkcs12 $username

  echo "Creating the config directory"
  userdir=$base/configs/$username
  mkdir $userdir
  cp $base/easy-rsa/keys/$username.p12 $userdir
  cp $base/configs/template-config.ovpn $userdir/$username.ovpn
  sed -i "s/<>/$username/g" $userdir/$username.ovpn
  cd $userdir
  /usr/bin/zip $userdir/$username.zip $username.*

  echo ""
  echo "User created"
  echo ""
 fi
}

#----------------------------------------------------------------#
# show the usage
#----------------------------------------------------------------#
function show_usage()
{
  echo ""
  echo "Usage: $0 [option] [arg]"
  echo "Where [option] is:"
  echo ""
  echo "-new"
  echo "   Create a new user"
  echo "   [arg] = "
  echo ""
  echo ""
}
#----------------------------------------------------------------#

#----------------------------------------------------------------#
# Parse action
#----------------------------------------------------------------#
function parse_action()
{
   case $action in
      -new)
        username="$option"
        new_user
        ;;
      *)
        show_usage
        ;;
   esac
exit 0
}
#----------------------------------------------------------------#

#----------------------------------------------------------------#
# Main function
#----------------------------------------------------------------#
function main()
{
  if [ "X${action}" == "X" ]
   then
    show_usage
    exit 0
   else
    parse_action
  fi

}
#----------------------------------------------------------------#

#----------------------------------------------------------------#
# run the Main script
#----------------------------------------------------------------#
main
#----------------------------------------------------------------#
Now make the script executable and run it with “-new johndoe” to create a new vpn certificate for user John Doe.
cd /etc/openvpn
chmod 700 new-user
./new-user -new johndoe |
cd /etc/openvpn
chmod 700 new-user
./new-user -new johndoe
And finally we start the openvpn service:
/etc/init.d/openvpn start |
/etc/init.d/openvpn start
Firewall
Now we add a IPtables firewall script to protect the network from the VPN clients.
mkdir /opt/firewall
vi /opt/firewall/localfw |
mkdir /opt/firewall
vi /opt/firewall/localfw
#!/bin/bash
#----------------------------------------------------#
#   Firewall for bridged openvpn
#   ver 0.1 20111021
#----------------------------------------------------#

echo "--------------------------------"
echo "IPTABLES FIREWALL SCRIPT LOADING"
echo "--------------------------------"

modprobe ip_tables

#--------------IP Variables -------------------------#
DNS1=192.168.255.1                      # dns server 1
DNS2=192.168.255.2                      # dns server 2
DNSSERVERS="$DNS1 $DNS2"

WAN_IF="br0"                            # WAN Interface
WAN_IP="192.168.255.3"                  # WAN IP

LANRANGE="192.168.255.0/24"               # LAN Range
#-----------------------------------------------------#
IPTABLES="/sbin/iptables"       # path to iptables

#-----------------------------------------------------#
# Check how we are started
CMD=$1
echo "Checking how we are started"
if ( [ -z $CMD ] ); then CMD="start"; fi
#-----------------------------------------------------#

#-----------------------------------------------------#
if ( [ $CMD = "start" ] ); then
#-----------------------------------------------------#

 echo "checking if we need to enable IP forwarding"
 IPFWDCHK="`cat /proc/sys/net/ipv4/ip_forward`"
 if ( [ "$IPFWDCHK" != "1" ] ); then
   echo "IP forwarding not enabled yet enabling forwarding now"
   echo 1 > /proc/sys/net/ipv4/ip_forward
 fi

#--------------- Firewall default --------------------#

 # Default policy: ACCEPT
 $IPTABLES -P FORWARD ACCEPT
 $IPTABLES -P INPUT ACCEPT
 $IPTABLES -P OUTPUT ACCEPT

 # Flush
 echo "Flushing all rules"
 $IPTABLES -F
 $IPTABLES -t mangle -F
 $IPTABLES -t nat -F
 $IPTABLES -F FORWARD
 $IPTABLES -F INPUT
 $IPTABLES -F OUTPUT

 # Default policy: ACCEPT
 $IPTABLES -P FORWARD ACCEPT
 $IPTABLES -P INPUT ACCEPT
 $IPTABLES -P OUTPUT ACCEPT
#-----------------------------------------------------#

 # high-volumes
 $IPTABLES -N Aforward

 #allow fragmentation-needed
 $IPTABLES -A Aforward -p icmp --icmp-type fragmentation-needed -j ACCEPT

fi

echo "Start setting VPN Client rules"

#-----------------------------------------------------#
#       VPN CLIENT RULES FROM HERE                    #
#-----------------------------------------------------#

if ( [ $CMD = "VPN" -o $CMD = "start" ] ); then
        ####################################################
        # VPN Clients
        #########################
        echo " - Setting rules for VPN Clients"
        $IPTABLES -F vpn-clients
        $IPTABLES -X vpn-clients
        $IPTABLES -N vpn-clients
        if ( [ $CMD = "start" ] ); then
                for ip in 192.168.255.200 192.168.255.201 192.168.255.202 192.168.255.203 192.168.255.204 192.168.255.205 192.168.255.206 192.168.255.207 192.168.255.208 192.168.255.209 192.168.255.210
                    do
                        $IPTABLES -A FORWARD -s $ip -j vpn-clients
                        $IPTABLES -A FORWARD -d $ip -j vpn-clients
                done
        fi

        # YOUR RULES GO HERE

        # HTTP to a local webserver (for example)
        $IPTABLES -A vpn-clients -p tcp -d 192.168.255.10 --dport 80 -j ACCEPT
        $IPTABLES -A vpn-clients -p tcp -s 192.168.255.10 --sport 80 ! --syn -j ACCEPT

        # ALLOW Ping
        $IPTABLES -A vpn-clients -p icmp -j ACCEPT

        # DROP ALL Other
        $IPTABLES -A vpn-clients -j LOG --log-prefix "[DROP-vpn-clients ]"
        $IPTABLES -A vpn-clients -j DROP
        #########################
        # VPN range
        ####################################################
fi

#-----------------------------------------------------#
echo "Done setting VPN Client Rules"
#-----------------------------------------------------#
#       VPN CLIENT RULES UNTIL HERE                   #
#-----------------------------------------------------#

#-----------------------------------------------------#
if ( [ $CMD = "start" ] ); then
        #********************************************************
        # VPNServer local rules
        #********************
        echo "Setting local rules"
        # ssh in
        $IPTABLES -A INPUT -p tcp -d $WAN_IP --dport 22 -j ACCEPT
        $IPTABLES -A OUTPUT -p tcp -s $WAN_IP --sport 22 ! --syn -j ACCEPT

        # VPN in
        $IPTABLES -A INPUT -p tcp -d $WAN_IP --dport 443 -j ACCEPT
        $IPTABLES -A OUTPUT -p tcp -s $WAN_IP --sport 443 -j ACCEPT

        # DNS lookups naar DNS
        for i in $DNSSERVERS
        do
          $IPTABLES -A OUTPUT -p udp --sport 53 -d $i -j ACCEPT
          $IPTABLES -A INPUT  -p udp -s $i --sport 53 -j ACCEPT
          $IPTABLES -A OUTPUT -p udp -d $i --dport 53 -j ACCEPT
          $IPTABLES -A INPUT  -p udp -s $i --dport 53 -j ACCEPT
          $IPTABLES -A OUTPUT -p tcp -d $i --dport 53 -j ACCEPT
          $IPTABLES -A INPUT  -p tcp -s $i --dport 53 -j ACCEPT
          $IPTABLES -A OUTPUT -p tcp --sport 53 -d $i ! --syn -j ACCEPT
          $IPTABLES -A OUTPUT -p udp --dport 123 -j ACCEPT
          $IPTABLES -A INPUT -p udp --sport 123 -j ACCEPT
        done

        # local everything
        $IPTABLES -A OUTPUT -p tcp -d 127.0.0.1 -s 127.0.0.1 -j ACCEPT
        $IPTABLES -A INPUT -p tcp -s 127.0.0.1 -d 127.0.0.1 -j ACCEPT
        $IPTABLES -A INPUT -p tcp -d 127.0.0.1 -s 127.0.0.1 -j ACCEPT
        $IPTABLES -A OUTPUT -p tcp -s 127.0.0.1 -d 127.0.0.1 -j ACCEPT

        $IPTABLES -A OUTPUT -p udp -d 127.0.0.1 -s 127.0.0.1 -j ACCEPT
        $IPTABLES -A INPUT -p udp -s 127.0.0.1 -d 127.0.0.1 -j ACCEPT
        $IPTABLES -A INPUT -p udp -d 127.0.0.1 -s 127.0.0.1 -j ACCEPT
        $IPTABLES -A OUTPUT -p udp -s 127.0.0.1 -d 127.0.0.1 -j ACCEPT

        $IPTABLES -A OUTPUT -p icmp -d 127.0.0.1 -s 127.0.0.1 -j ACCEPT
        $IPTABLES -A INPUT -p icmp -s 127.0.0.1 -d 127.0.0.1 -j ACCEPT
        $IPTABLES -A INPUT -p icmp -d 127.0.0.1 -s 127.0.0.1 -j ACCEPT
        $IPTABLES -A OUTPUT -p icmp -s 127.0.0.1 -d 127.0.0.1 -j ACCEPT

        # browse (apt, etc..)
        $IPTABLES -A OUTPUT -p tcp -s $WAN_IP --dport 80 -j ACCEPT
        $IPTABLES -A INPUT -p tcp -d $WAN_IP --sport 80 ! --syn -j ACCEPT
        $IPTABLES -A OUTPUT -p tcp -s $WAN_IP --dport 443 -j ACCEPT
        $IPTABLES -A INPUT -p tcp -d $WAN_IP --sport 443 ! --syn -j ACCEPT

        # ALLOW ICMP
        $IPTABLES -A INPUT -p icmp -j ACCEPT
        $IPTABLES -A OUTPUT -p icmp -j ACCEPT

        # deny rest
        $IPTABLES -A INPUT -j LOG --log-prefix "[DROP-INPUT-WAN] "
        $IPTABLES -A INPUT -j DROP
        $IPTABLES -A OUTPUT -j LOG --log-prefix "[DROP-OUTPUT-WAN] "
        $IPTABLES -A OUTPUT -j DROP
        #$IPTABLES -A FORWARD -j LOG --log-prefix "[DROP-FORWARD-WAN] "
        $IPTABLES -A FORWARD -j DROP

        # Reset default policy: DROP
        $IPTABLES -P FORWARD DROP
        $IPTABLES -P INPUT DROP
        $IPTABLES -P OUTPUT DROP
fi
#-----------------------------------------------------#

echo "--------------------------------"
echo "IPTABLES FIREWALL SCRIPT LOADED "
echo "--------------------------------"
#-----------------------------------------------------#
#eof
#-----------------------------------------------------#
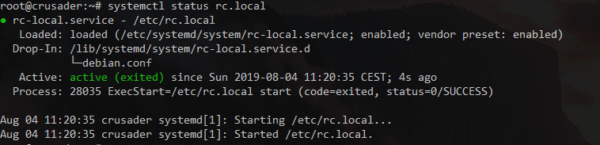
Then make the script executable and add the firewall to run at startup
chmod 700 /opt/firwall/localfw
vi /etc/rc.local (add <strong>/opt/firewall/localfw</strong> just before exit 0) |
chmod 700 /opt/firwall/localfw
vi /etc/rc.local (add <strong>/opt/firewall/localfw</strong> just before exit 0)
VPN status
This script will show you some statistics on the VPN server.
vi /usr/local/bin/openvpn-status |
vi /usr/local/bin/openvpn-status
#!/usr/bin/env python
# -*- coding: utf-8 -*-

STATUS = "/var/log/openvpn-status.log"

status_file = open(STATUS, 'r')
stats = status_file.readlines()
status_file.close()

hosts = []

headers = {
    'cn':    'Common Name',
    'virt':  'Virtual Address',
    'real':  'Real Address',
    'sent':  'Sent',
    'recv':  'Received',
    'since': 'Connected Since'
}

sizes = [
    (1<<50L, 'PB'),
    (1<<40L, 'TB'),
    (1<<30L, 'GB'),
    (1<<20L, 'MB'),
    (1<<10L, 'KB'), (1, 'B') ] def byte2str(size): for f, suf in sizes: if size >= f:
            break

    return "%.2f %s" % (size / float(f), suf)

for line in stats:
    cols = line.split(',')

    if len(cols) == 5 and not line.startswith('Common Name'):
        host  = {}
        host['cn']    = cols[0]
        host['real']  = cols[1].split(':')[0]
        host['recv']  = byte2str(int(cols[2]))
        host['sent']  = byte2str(int(cols[3]))
        host['since'] = cols[4].strip()
        hosts.append(host)

    if len(cols) == 4 and not line.startswith('Virtual Address'):
        for h in hosts:
            if h['cn'] == cols[1]:
                h['virt'] = cols[0]

fmt = "%(cn)-25s %(virt)-18s %(real)-15s %(sent)13s %(recv)13s %(since)25s"
print fmt % headers
print "\n".join([fmt % h for h in hosts])
Now make the script executable.
chmod 700 /usr/local/bin/openvpn-status |
chmod 700 /usr/local/bin/openvpn-status
If you run it and a client is connected you will see something like this:
# /usr/local/bin/openvpn-status
Common Name               Virtual Address    Real Address             Sent      Received           Connected Since
johndoe 00:00:00:00:00:00 1.2.3.4 1.11 MB 489.49 KB Wed Dec 11 13:26:42 2011 |
# /usr/local/bin/openvpn-status
Common Name Virtual Address Real Address Sent Received Connected Since
johndoe 00:00:00:00:00:00 1.2.3.4 1.11 MB 489.49 KB Wed Dec 11 13:26:42 2011
References